Anubis Great Danes . com
More on ears taping ..
The following is the method I have been using with great success. As well, at the end, there is a link to additional material on post-cropping care illustrates the most common ears taping technique, and it's very similar to what I do. It was mailed to me by the breeder from whom I purchased Nifirtiti. But first, here is what I do and what I have always exactly done very successfully with my Danes:
1- First, ears taping after cropping is no big deal. With a little patience and attention, in just a maximum of usually 3 weeks or sometimes a few weeks - likely very few weeks, if not a few days, your pup's ears will be erected straight up in a graceful Dane fashion. Just keep them up every time you change the tape.
Once the ears have healed after the cropping (in a week to 12 days) and are dry and you can see that there is no infection, the tape can be up for a week - and the
way I do it does not call for an entire wrapping of the ear - which created a warm unaired ear , rather one or two narrow tape rings.
I heard so many stories about how long taping takes and weeks of work!!! I don't understand it!! Anubis was cropped at 7 months and it took less than 3 weeks to
remove the taping for good. My present pup, "Ra", was cropped at 12 weeks, and I didn't even use the foam support, not even for a day. In fact, after
removing the cone (see photo below) which is what the vet used right after cropping, the ears were erect starlight up against the cone for 12 days, that
was all that was needed. I did NOT do anything except place a ring of 1/2 inch tape around the top part of the ear to support the very top tip. That's it,
and was not needed after a few days. No inside ears taping, no around ears wrapping, no glue, no support, nothing at all. Of course a good vet makes
a big difference.
2- My method of ears taping is similar to the attached material. Here it is in simple terms:
- clean & dry the ears.
- use latex skin glue sold specifically for this purpose and sports tape. You need to place support along the inside of the ear from the base level (level with
the head) up to to tip of the ear.
- You can glue a few layers of the tape to each other then use the glue to tape the tape itself to the inside of the ear, a starlight line up. Or, use a piece of
foam (sponge-like) rode and glue it to the inside of the ear. In either case, you hold the tip of the ear pulled straight up to ensure that the skin is flat
starlight up. Hold the ear around the inside support foam or tape you glued on the inside on the ear for a few minutes to allow the glue to take effect.
Note that you're using the specific pharmaceutical skin glue I mentioned, easily removed with no pain..
- apply a generous amount of the glue to a foot long piece of tape and wrap it around the ear starting at the low base point. Very important that you use the
two ear skin parts (folding) that bend opposite to each other to maintain the shape of the ear base. In other words, when you are facing the pup, his left ear is
on your right, so let us deal with the pup's left ear that is on your right when you're facing the pup: the outside (far right) side of the ear will fold towards you,
while the left side of the same ear is closer to the other ear folds away from you towards the pup's back. (taping clockwise)
Now, the other ear,. the one on your left when you're facing the pup, which is the pup's right ear: the same thing, the far left side will fold forward towards you
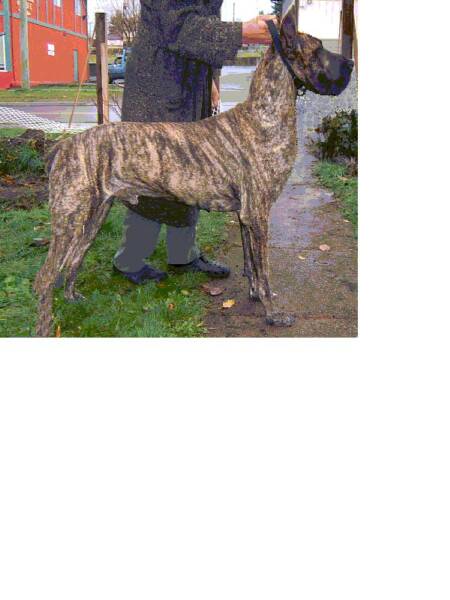
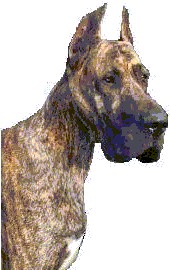
(towards the pup's face) while the (inside) side closer to the other ear will fold backwards towards the pup's back (counter clockwise). See Anubis's ears
above.
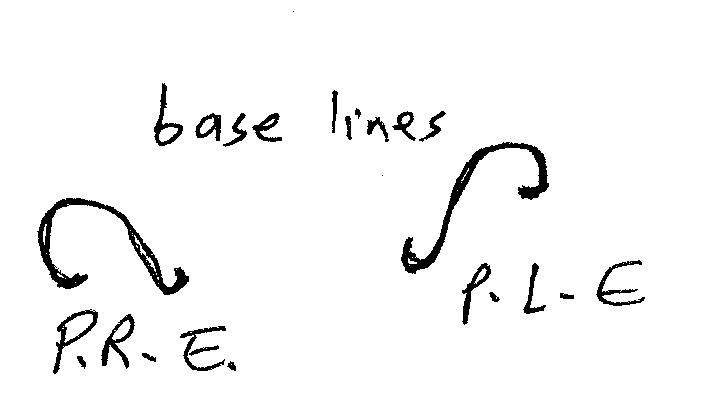
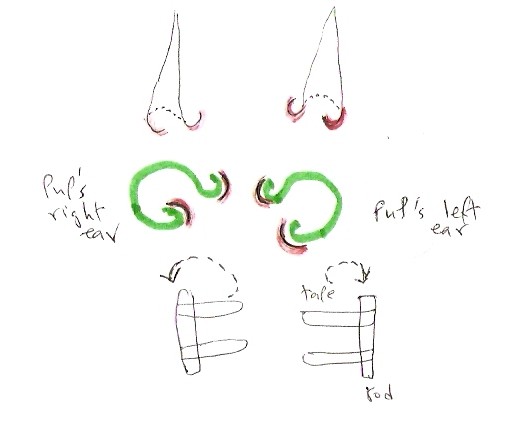
You're basically maintaining and emphasizing a semi-cone shape, not a flat sheet shape. See the illustration to
the right: PRE = Pup's R. Ear & PLE = pup's left ear base line on the head.
- I use the glue and the tape and simply - starting at the base (bottom) I tape around the ear (while stretching it up
straight). It's that simple.
Most vets use a foam cup placed upside down on the pup's head and tape the ears to that cup.
This procedure is good specially for the initial stage immediately after the surgery when the cut is
fresh and needs extra protection by wrapping it as shown below - allowing room for the inside of
the ear to air.
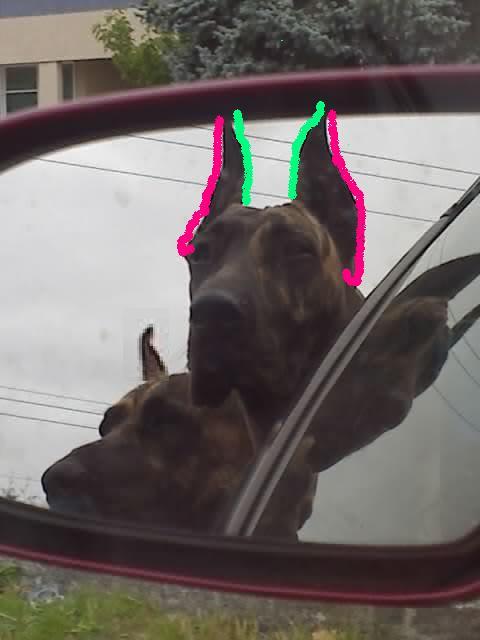
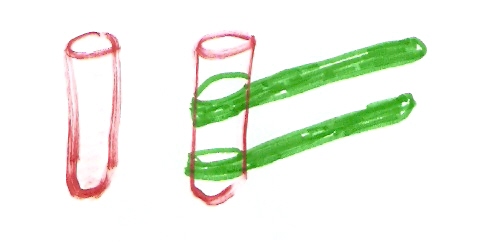
Now remember that the ear cropping procedure involves a cut to one side only of the ear, the outside, which
in the illustration photo on the right would be the red lines.
.
The two "inside" sides (the green lines in the picture to the right) of the ears facing ear other, are not cut.
And those two "green" sides are the ones to be taped to the cup placed on the head. This tape will not be removed during the initial stage of using the cup, which is about 2 weeks until the stitches are removed. The cup itself also is not replaced. The cup stays and the two green lines of the ears remain taped up to the cup.
The red lines of the ears, where the surgery was performed, are treated with antibiotic cream and covered with a gauze tape (non-sticky, and then the cup and the ears are wrapped with elastic wrapping tape as you see in the picture above (in this case it's a red colour tape). Every second or third day, that outside wrap is removed, the strip of gauze on the red lines are removed, ointment applied and the red lines are covered with fresh gauze strips and then the outside re-wrapping again.
A cone as you see above is used to prevent the pup from scratching at his ears and damaging it. The cone is needed during this initial 10 days to 2 weeks after the surgery when the cup method is used.
Past the first 10-15 days when the stitches are removed, the cup is removed, the ears are then taped up as explained via the links below. In fact, by now, 12 days to 2 weeks, should be very well up already, just need a confirming supportive 2 or 3 more weeks.
Now, here is what once the initial 12-15 days cup stage is past (2 weeks post surgery):
Use a foam rod. It's a spongy soft and flexible but firm enough rod comes in a coil package from a hardware store. I do not recommend tampon as it is hard enough to cause ear skin damage if the pup runs into a wall or otherwise presses against it.
P1466-03 Solvo-Plast II adhesive remover (distributed by Source medical corporation, Mississauge, Ont. Canada).
Now, the free-extended tape will circle around the ear so that the tape (green tape shown in the
illustration above) would be extending towards the area between the two ears). Meaning, the
illustration shown above would be for the pup's right ear, on your left facing the pup eye to eye.
So the right ear is taped counter-clockwise.
If you turn that piece of foam upsidedown, it would be for the pup's left ear, on your right facing the
pup, and would be taped clockwise. the left ear would
First, if using the OSTO-bond, brush half an inch strip along the inside of the ear from bottom to top.
Also brush the side of the foam facing away from you in this illustration above. Meaning not the side
shown where the tape extends past the foam rode, rather, the opposite side.
After applying the glue to both the inside ear skin and and the foam rode, allow 2 minutes then
hold the ear stretched up by its top end and place the rode into the pup's ear and press and hold
the ear stretched up and against the rod and surround your hand around it for a couple of minutes.
Tape around the ear keeping the natural support curves shown to the right in red arcs. Create two
rings of taping around the ears and at the end of the tape, use a strong glue, to tape "tape-to-tape"
meaning to secure the end of the tape on top of the tape that has already run around the ear, thus
the glue is not applied to the skin.
Make sure the ears are kept erect and straight up, with the shape of the base kept as shown in green to the right.
It should take maximum 3 weeks for the ears to be up and to stay up if you do it right. Otherwise, extend the time until they stay up.
I hear stories about ears taking two months to stand and I could never stand why so long? My last puppy was cropped late at 12 weeks, the cone stayed on his head for 12 days, then all I had to do after that is one ear had one ring (a thin 1/2 inch tape) and the other had two rings, no even foam rod; and that was for just an additional 10 more days and that's it.
I'll post picture here with my next pup.
For now, the link posted below uses almost the same procedure and provides clear pictures. It's a good illustrative material sent to me by a friend.
As I said, I'll be producing a complete Dane reference material in video and literature and will be made available for free to use as needed. click on the file below to view it:

Use strong glue such as crazy glue and glue the 1/2 or 3/4 inch tape around and to the rod as show going over the starting end with one circule around the circumfernce of the rod as shown. one at the top one nea the bottom, leaving about 6 inches free.
The foam rod is glued to the inside of the ear itself using one of the following products:
"It Stays" roll-on body adhesive that washes off with water (made by Sigvaris corp. St. Laurent, Quebec Canada) If the pup will be exposed to water, even eccessive exercise causing sweat, this glue may not be the choice but generally it is good enough for 2-3 days.
The other glue option is:
OSTO-Bond adhesive latex skin bonding. (by M.O.C. Vaudreuil, QC. Canada).
This skin glue will need glue removal:
